The Different Types of Images On The Web Images on the web will come in
many file formats, some are JPEG (also know as JPG) or GIF or BMP.
JPEG Images
Example JPEG Image |
A JPEG file stands for Joint Photographic Experts
Group and all images under this format has the file extension of .JPG.
You would use a JPEG image for photographs, realistic scenes, or other
images with subtle changes in tone. The JPEG file format is not good for
images which have sharp lines or lettering, they have a tendency to get
blurred. JPEG original files should never be erased as each time you save
a JPEG image the image will deteriorate more and more. You should always
go back to the original |
GIF Images
 |
Gif stands for Graphic Interchange Format. All
images under this format have the file extension of .GIF. This format is
the most commonly used image format on the web and includes features that
enable background
transparency and animation.
|
Saving Images From The WebThere are many images on the web that you can
use in your own web pages, presentations, documents and papers. You can save
these images individually to your own computer Create a separate directory for
all your images and call it something like Download and then create a
subdirectory called Images. This way you know where to find all the images that
you have downloaded from the web. You could even subdivide the images directory
up into categories to make each of your images even easier to locate.

|
In order to save the woman dancing image on the left, put
your mouse over the image. If you are using Netscape on a PC click your
right mouse button , for Macintosh users hold your mouse button down. If
you are using Explorer just place your mouse over the image for Macintosh
& PC users and give it a couple of seconds. While your mouse is over
the image a menu like the one below will come up. 
You can see that one of the options is SAVE IMAGE AS. All you
need to do is click on this option and save the image to your computer in
your special directory. For information on the other options in this menu
see Webhint
10 |
Making Screen Captures Of Web PagesScreen Capture involve as the name
suggests capturing the image of the entire screen or a particular portion of the
screen that you select. For entire screen captures Windows 95 users can press
the print screen button on their keyboard. This copies the entire screen to the
clipboard. You only need to paste it into the application of your choosing. If
you are not using Windows 95 or would like to do partial screen captures you can
download a program like Paintshop Pro.
Download and save this program to your special Download directory
under Programs, and then follow the instructions within the file to set it up on
your computer. For more help with this see the Download
Section of these materials.
The following instructions are based upon the 32 bit version of Paintshop
Pro, other packages and the 16 bit version for Windows 3.1 users operate in a
very similar manner. Once you understand the concepts you can use most screen
capturing software.
After you open the software click on Capture on the Menu bar and then click
on Setup with your mouse.
The setup menu will bring up a box like this one.
In the Capture section you are mainly interested in the two top
options. Area and Full Screen. If you have Full Screen ticked, the program will
capture the entire screen of your computer including all menu bars and
everything it can see. If you select Area, you will then mark the Area that you
wish to capture.
The Activate Capture Using section lets you choose which button will
be the trigger for the capturing process. It is set on a right mouse click here
but you can change it to be any of your function keys, like F11 for example. You
might want to do this so you don't get confused with right mouse clicks for
saving individual images. Once your options are set you can click on capture
now. In future when you use your software you only need to click on
Capture and Start to start doing captures.
Once you do this, the Paint Shop Pro Program will hide itself from view so
you can start capturing what is on your screen because you need to be able to
see the image or page that you wish to capture so this has to be foremost on the
screen. When you have this on your screen, hit the trigger key to start
capturing (F11 if you changed this). A cross will come up on screen. Position
this cross at the corner of where you wish to start your area screen capture.
When you are positioned, click your left mouse button once, let go and start
moving your mouse over the area you wish to capture. As you move your mouse you
will see an outline line of the area in white and measurements changing as you
enlarge or reduce the capture. When you have the entire area covered click your
mouse button again. You will be returned to the Paint Shop Pro program and the
area you have captured will also be there.
| You will see that Paint Shop Pro has saved the area that you marked
for saving. It has also given the file a temporary name of Image1.* You
will need to give the file a correct name by clicking on File then Save or
Save As. |
 |
To capture the entire screen change your Capture options to Full Screen and
then click on capture now. Your entire screen will be captured using the same
process as saving a selection. Remember you will get everything in there
including the buttons and menus around the page. You can crop this image
afterwards to get rid of these things by clicking on the Selection
Button. Then with your mouse highlight the area you would like to keep. So
start at the corner, click your left mouse button, hold it down and drag your
mouse to the end of what you would like to keep, then let go of the mouse button
and that area will be enclosed in a rectangle. Now that you have this area
highlighted, click on the Menu option Image and then Crop Now. Everything except
the area you have highlighted will disappear..
Paintshop Pro.
Download and save this program to your special Download directory
under Programs, and then follow the instructions within the file to set it up on
your computer. For more help with this see the Download
Section of these materials.
The following instructions are based upon the 32 bit version of Paintshop
Pro, other packages and the 16 bit version for Windows 3.1 users operate in a
very similar manner. Once you understand the concepts you can use most screen
capturing software.
After you open the software click on Capture on the Menu bar and then click
on Setup with your mouse.
Finding Images On The WebWhere do you find images? There are lots of
collections of free ClipArt available on the web. Just to get you started here
are some places you can go to get buttons, backgrounds, icons and images for
your web page. If you are not sure how to save them Read the Saving
Images information first.
Making Your Own GraphicsGraphics software will allow you to create,
alter and organize you graphics. You can even create animated graphics.
PhotoShop for both Macintosh and PC is a powerful graphics program which you can
use to create original images for your web publishing. For some tips on creating
web graphics with PhotoShop, Tom's Tips for Web
Designers will, amongst other ideas, teach you about making custom buttons
and backgrounds.
If you need more information about graphics software, The Graphic Utilities
Site and Version FAQ is a long document which will tell you which is the
latest version of the software you are interested in, what file types it will
handle, and where you can find it.
Adding Images To Web PagesAdding graphics, including ClipArt,
photographs and backgrounds to your WWW page can not only make it more
attractive, but can make it easier to use. For example, you could use symbols or
colors to help people navigate your page or site. However you need to keep in
mind that while some graphical interest is good, the graphics should neither
overwhelm the content of your page, nor make it difficult to read or explore. If
you use graphics on your web site try and make them AS SMALL AS POSSIBLE. A good
guide is to keep the total for all graphics under about 30 Kb per HTML
page. Use JPEG for photographic images (use the most compression possible), and
GIF for computer artwork, drawings etc.
You also need to remember that many people, because of limitations of time,
cost or software, either don't see, or choose to turn off images. Your web page
needs to be designed so that the maximum number of people can view it
adequately, which means that you need to make sure that your images aren't so
big that the page takes forever to download (20k is about the maximum size). If
you use graphics as a navigation device make sure that you include ALT
references (where you give a text description as part of the image direction).
The basic code to do this is:
<IMG SRC="IMAGES/SNAKE.JPG" ALT="Picture of a Snake"> 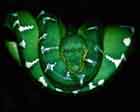
The information within the quotation marks is the path of the image or where
the image can be located. These quotation marks around the path of the image
file are important and if left off will leave you with a broken image symbol
like this ![]() . You will also get a broken image if the path name is
incorrect or the filename of the image is incorrect. . You will also get a broken image if the path name is
incorrect or the filename of the image is incorrect.
All images should be kept in a separate directory from your HTML files. Most Websites
store images in sub-directories and title it images or gif and jpeg for
each type of image.
You can find more information about adding images to
your web page, or working with images
from the Sunrise Laboratory's HTML tutorials.
Aligning Images On Your Web Pages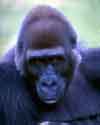 <IMG SRC="IMAGES/APE.GIF" ALIGN=LEFT> Align Images To The Left <IMG SRC="IMAGES/APE.GIF" ALIGN=LEFT> Align Images To The Left
<IMG SRC="IMAGES/APE.GIF" ALIGN=RIGHT> Align Images To The
Right>
Aligning Text With Your Images On Your Web Pages<IMG SRC="IMAGES/APE.GIF"
ALIGN=TEXTTOP> Align
Text To The Top
<IMG SRC="IMAGES/APE.GIF" ALIGN=MIDDLE> Align Text To The
Middle
<IMG SRC="IMAGES/APE.GIF" ALIGN=BOTTOM> Align Text To The
Bottom
This code will only allow one line of text to be aligned. The text will
scroll under the image for the next line. If you would like a paragraph of text
to be aligned with your image you should include your image and text in a table
with separate columns. See below.
 |
By placing my image into the first column of the table and all the
text I would like to include in the second column, I am able to word wrap
the text within that column and align it to the image. I can also use
align commands on each column for the text to be aligned to the top,
bottom or middle of the image by including VALIGN= commands within the TD
Tag. You can find more
information on the table commands here or look at the code for this
table below. |
<TABLE>
<TR>
<TD><IMG SRC="IMAGES/APE.JPG"
ALT="PICTURE OF APE"></TD>
<TD>By placing my image into the
first column of the table and all the text I would like to include in the second
column, I am able to word wrap the text within that column and align it to the
image. I can also use align commands on each column for the text to be aligned
to the top, bottom or middle of the image by including VALIGN= commands within
the TD Tag....</TD>
</TR>
</TABLE>
Background TransparencyTransparency is the feature that allows you to
specify that one of the colors within the image be ignored when viewed on the
web. By using transparency you are able to create images that seem to merge with
the background and can give objects shape. Currently this can only be done on
GIF Images.
For example the image below before and after having made the background (the
brown color) transparent.
To make a gif image transparent, you will
need to download a program like Gif Movie Builder, Gif Construction Set
for PC users or Gif
Builder for MAC users.
How to Make the Gif background transparent (Gif Construction Set)
- Open the Software
- Click on File and then Open
- Click on the File you would like to contain transparency
- Click on Insert and a box like the one here will appear
- Click on Control
- The Control function will be inserted into the program. You must give each
image a control.
- Double click on control in the program an option menu like this will be
displayed
- Click on Transparent Color and then click on the eye dropper on the left
of the box
- The image will then be displayed and you click on the part of the image
that you would like to be transparent. Remember only one color in the image
can be transparent and that wherever the color appears there will be
transparent. So if your background is black an parts within the image are
black, all of it will become transparent.
- After you use the ink dropper to select the color, the color number will
be displayed in the software.
- That's it, just save your file now
AnimationGIFStream is a technique of saving multiple images in a GIF
89a format file. When viewed with Netscape 2.0, the series of images is
displayed one after the other, creating an animation sequence.
We use PhotoShop and paintshop pro to create our images but any shareware
paint programs can be used to create the images that are made into an animated
gif. Paintshop Pro is shareware for Windows users and can be obtained from JASC Incorporated and Macintosh users can try
Maczilla. To make the actual animation
windows users should download GIF Construction Set
from Alchemy
Mindworks, while Mac Users should download the freeware package GifBuilder.
The Macintosh tool has the added advantage of handling TIFF and PICT files, as
well as GIFs. Shown here is an example of an animation sequence that gives the
impression of motion. You could use this to replace actual images where each
frame is an independent image with no relation to the previous image. For
browsers under version 2.0 only the first image in the sequence will be seen.
Remember this when making your animations.

The first thing you'll need to do is decide on the contents of your
animation. You'll want to keep the number of frames low to keep the file size
down. Prepare all of your images, and save them in the same pixel dimension
(e.g., 80 x 100). Order the file names so you can build the block in the right
order.
Here are instructions for using the latest version of GIF Construction Set
for Windows. Instructions for GifBuilder are directly below.
- In GIF Construction Set, pull down File | New.
- Double-click on the Header block and change the dimensions to equal the
dimensions of the images you'll be using. Leave the rest of the default
settings alone for now.
- Click on Insert and choose Loop from the palette.
- Click on Insert and choose Control from the palette.
- Click on Insert and choose Image from the palette. Navigate to the
location of the first image in your series. When the palette dialog comes up,
choose "Use a local palette for this image."
Repeat steps 4 and 5 until your series is finished. When finished, you should
have one Header block and one Loop block, plus one Control block for every image
you use. The order is important. The Control blocks have to be above the Image
blocks. Make sure each image is visible in the preview window to the right. If
it's not, delete that image from the list and re-import it, using a different
palette option.
Test your animation by clicking on the View button.
To control the playback speed of your series, click on each of the Control
blocks and adjust the delay time in milliseconds.
Instructions for using GifBuilder for Macintosh
- Drag files into the Frames window
- Arrange the frames in the order you want by dragging them.
- Set the options in the extensive Options menu
- Build the animated GIF.
Inserting Web Images in Other ApplicationsTo use any of the image that
you take off the web and insert it into another application is a simple process
but don't forget the the copyright
issues. For example with Microsoft Word you would just click on
Insert then Picture like here. Most packages that you would use
would have an insert option like this. Then all you have to do is locate the
picture in the directory you saved it in.
You can adjust the size of the image in your application simple by clicking
on it and dragging it the shape and size you want by the markers on the corners
of the images.
Making Image MapsImage maps are images that have areas on it that are
hot linked to different pages. Not just the entire image as one hot link but you
can mark the areas of an image to link to many different areas. You can see an
image map in action in the Virtual Lounge. It is
one image that has hot links from the various objects within the lounge to areas
relating to image you click on. For example if you click on the television you
will find out all about movies on the internet, etc...
In order to make image maps you should download a shareware program like Live Image or the Coffee Cup Image Mapper. Live
Image is a more sophisticated program with an easy to use interface. Some of the
options don't work on the shareware version though. The Coffee Cup Image Mapper
is very simple to use and all options work on the shareware version.
Making image maps has become a really simple task with these type of software
programs. They come with wizards that guide you through the process. After
opening up the image that you wish to place an image map on, you only need to
highlight the areas you wish to hot link, you then type in the web site
addresses that you wish to link to on the image. Once you are finished the
Coffee Cup Image Map will create a new html file. You can copy the mapping code
into the page you would like the image and map to live on. Live Image will
insert the map into an existing page for you.
So you want an image map,
huh? from Joe Burns, is a an excellent introduction to making clickable
image maps.
Director Web is an excellent starting point if you want to find out more
about Shockwave. From this site you can find tips, a Director FAQ (frequently
asked questions), links to software sites and examples of Shockwave programming.
Shocked Sites is a collection of
links to Shockwave sites on the web.
© State of Victoria
(Department of Education, Employment & Training)
Initiative of the
SOFWeb Project
Contact: SOFWeb
Last Updated: August 11, 2000
|


